Pages

Thursday, June 23, 2016

The yarn bleach test - an easy check for wool

There are a couple of methods to check whether a certain yarn is primarily protein fibre (wool, alpaca, llama, mohair, silk, etc.) or whether it's a plant fibre, or a synthetic fibre.  One of these is the burn test, in which you carefully hold a small piece of yarn to a flame (candle is easiest in my opinion) and watch the reaction.  Synthetics actually burn and make a plastic-looking melted blob on the end.  Protein fibres smell bad and sort of smoulder, and plant fibres tend to make a light ash.  This method is a very good diagnostic for synthetics, but not as good for blends.  There are small differences between the types of ash for the various fibre types, but they're difficult to read, at least in my opinion.

I personally prefer the bleach test.  It tells me whether or not a fibre is primarily protein, but it can also tell me if I've got a blend.  It's also fairly diagnostic for determining silk apart from other protein fibres.  I also like the fact that I can re-use the bleach.  I don't keep bleach on hand for many purposes, but the bleach I use for yarn tests can be poured back into a glass jar and re-used.  Not everybody knows about the bleach test, so I thought I'd do a post about it.

You need to use real chlorine bleach - not the "colour-safe" stuff.  You don't need much of it though.  I use a small glass dish and cut pieces of the yarns that I'm not sure about.  Usually they're yarns from thrift stores, grab bags, or trades, and the content label is long gone.  Today I tested a group of yarns I thought were mostly acrylics.  I was surprised!

Here are my yarns at the beginning of the test.  I've just poured a wee bit of bleach in the dish - enough to cover the yarn.  I use an old fork to push the yarn into the bleach so it is saturated.  Do take a picture at the beginning of the test because you might forget which yarns were which....and some of them might be about to disappear...

The yarn on the far left - the dark red one - is my 100% wool control sample, so I can compare other yarns to it.


Within about 5 minutes, many of the yarns were telling me that they contained animal fibres.  As you can see in the picture below,  many of them are getting a halo of bubbles around them.  That's a sign that they contain protein fibres that are in the process of dissolving.


I was surprised to see the purplish bulky yarn was among the bubblers.  I had thought it was completely synthetic.  You can see it is definitely releasing bubbles, whereas the blue and green yarns to the left of it are not, nor is the cranberry to the right.  The pink yarn on the left is definitely a wool.

Here's a clear view of my control 100% wool sample, bubbling away.  The green and red yarns below it are doing the same, but the teal is not.

 After about half an hour, here's how things looked.  The wool sample on the far left, and many of the others, are definitely disintegrated and dissolving.  That tells me they're 100% wool (or another protein-based animal fibre).  I find that silk also completely dissolves, but it tends to take almost double the time that wool takes to completely dissolve.


You can also see that the thick purplish yarn has stopped bubbling.  This tells me that it's a blend.  It had a small percentage of protein fibre, likely wool, which dissolved initially.  Now it's just the synthetic fibre that's left over.

And here was the scene after an hour.  The wool (or other protein) fibres are completely dissolved. The five strands you see that never bubbled are completely synthetic, and the thick purple was a blend that bubbled for just a short time.


I didn't include any cotton yarns in this batch, but cotton, flax, and other plant fibres are unaffected by the bleach bath.  I can usually tell the difference between cottons and synthetics by feel, so I don't use the bleach test to differentiate between those fibre types.  If you're not comfortable discerning between plant and synthetic by feel, the burn test will certainly help you figure out which is which!  I also notice (but I'm not going to say that it's a guarantee) that the acrylics and other synthetics tend not to lose their colour in the bleach, even though it's 100% bleach.  You can see those yarns in the picture above are the same colours they started out as!  On the other hand, cotton and flax tend to actually bleach out their colour.

Another result that you'll see with this test is something that bubbles a lot and then leaves a fine thread behind.  This is the case with wool yarns that include nylon.  The nylon stays and the wool dissolves.  If you use your fork or other tool to swirl around any residues, you'll see if they're connected (i.e. synthetic leftovers) or just blobs of disintegrating protein fibre.

Here's an example of that in a test I did previously and photographed.  The dark yarn on the far left is a wool with nylon, and the black boucle in the middle is a likely mohair boucle with a binder thread.  The yellow, second from the left, is silk.  The far right orange one is a cotton.  The others are wool or other animal fibre.


Here you can see the dark wool on the right has partially dissolved, and the boucle has dissolved but left the binder thread, which is now on the right of the picture after I swirled things around a bit.  The cotton is in the middle and it has lost its colour.  The yellowish blob in the top is silk, but all the other wools have dissolved. The yellowish-brown thin piece along the bottom was an added afterthought, not in the first picture, so ignore it.


 At the end of that test, you can see what was left - the nylon on the left from the sock blend (which is folded in half), the centre is the boucle binder, also probably nylon, and the right is the now-bleached cotton.

 So, now you know how to do the bleach test to learn things about yarns when you're not sure about their fibre content.  I hope that helps someone figure out some mystery yarns!


Monday, June 13, 2016

Birds, and lending a helping hand!

There is a cute little bird feeder shaped like a house on the top of a post that was already here in the garden of the house.  It didn't have any seeds in it and looked like it hadn't been used in a while, but I wanted to start attracting birds, so I put some seed in it.  I've also installed a tube feeder with mixed seed and another with nyger seed, and a hummingbird feeder.  So far, I've been really excited with the bird activity over just a few short days since I put the feeders up.

The hummingbirds are visiting regularly throughout the day.  We only have ruby-throated hummingbirds here in eastern Canada, but they are lovely.  This picture was taken through the window screen.  Hopefully someday I'll be able to take pictures outside without them flying away!


I've had the following birds so far at the seed feeders, all of which are common here, but it's still lovely to have them visit (since our previous house only ever had chickadees and the occasional robin).

  • black-chapped chickadees
  • white-breasted nuthatches
  • purple finch (male)
  • common grackles
  • dark eyed juncos
  • robins
  • a warbler (I think) that I haven't identified yet that is mostly brown and white but has yellow patches on the side of its face (the bird ID book hasn't been unpacked yet)
Here's a poor picture of the purple finch taken with my phone - but I was so excited to see it! Sometimes it's difficult to differentiate between the male purple finch and male house finch, but I'm pretty sure this is the purple finch.

So today, I looked out at the little house feeder to see if I had any visitors, and a grackle was taking seed (as usual), but there seemed to be some additional fluttering going on.  I wasn't sure if it was another bird on the other side of the feeder.  Then I realized, it was another bird INSIDE the feeder!  A poor little white-breasted nuthatch somehow got itself inside the house!

Not wanting to stress the bird out any more than necessary, I quickly lifted the lid so he could escape. Here's a little video of my "good deed of the day"!


Saturday, June 11, 2016

I dug in the dirt today

Last week, Marc and I finally moved to our new home.  It was a long and stressful year, waiting for his house to sell, but once it did, things moved pretty quickly, and now we are just starting to settle in to our new home.  I still have the place in Nova Scotia to sell, but that's going to take a while, and I just need to be patient about it.

It has rained almost every day for the past week, so I didn't have many opportunities to get outside and do some garden work.  The new home has some established perennials already that I am slowly getting to know.

I'm really looking forward to the blooms on these poppies coming out - I do love poppy plants and they come in such vibrant colours.


There are a number of roses that I look forward to seeing in the bloom phase, so I'll know what colour they are.  My mom brought some English primroses to share that are originally from my grandfather's garden, so that is very special for me, and they are growing well already.  You can just see one of them in the centre front of the picture below - it has yellow flowers.  One of the trellises at the back has a clematis on it.


I wanted to get a few tomato plants into the ground - if you followed me back in Iowa, you might remember that I used to grow 30 or more varieties of tomato each year, up to 72 varieties one year.  I don't have that much space now, but I have put in a few.  I bought transplants this year because I don't have my plant light trolley set up yet so I didn't start my own, and it would be too late to do so at this point because we have such a short growing season.  I usually plant heirloom varieties, but this year it's just the hybrids.

I bought Burpee transplants - some indeterminate and some determinate varieties.  I planted a couple of different container varieties today - each of which produces extra lycopene, carotenoids and/or vitamin C.  I planted some "Cherry Punch" hybrid and some "Power Pops" hybrid in the containers.  They look a bit droopy here but I just finished showering them with the hose.


In the ground, I planted a "Super Sauce" hybrid as well as a couple of "Lemon Boy" tomato plants and a "Brandy Boy" F1 hybrid.  Next year I hope for better tomato supports too, but for now, I'll make do with what I have!


I also popped in a few creeping thyme plants because I do love them as a ground cover.  I received a peppermint plant from a local friend and planted it with a restraining "collar" made from an old planter to keep it from spreading too much.  I'm hoping to get some raised beds in for next year, but I have much to do before then, so a few tomato plants seemed like a good start.  I've also popped in a bunch of VERY old zucchini seed (2006 through 2010) with the hopes that a few might germinate.  I have my doubts but we'll see!


The perennial beds are really lovely and I'm excited to see what colours begin to emerge as things flower.  There are sedums and irises and astilbe, a wealth of hostas, and some plants I really don't know!  There's also a beautiful arbour but I think it has Virginia Creeper on it, which is not so lovely, because it's rampant and invasive and difficult to control.  If it is what I think it is, it might have to come out and something else will be planted on the arbour.


If you are wondering, yes, the sheep and goats will be here...but I do need to put in fencing and get a small barn in place first, so they're not here yet.  I have far less land than I would have liked - only 1.75 acres, because there weren't many places with land available to us in our target area, or the ones that had land weren't zoned correctly for sheep or goats.  Anyway, they'll have to have supplemental hay year round, but it will be so lovely to have them back with me.

Wednesday, March 30, 2016

Making No-Knead Bread

A while ago I had bookmarked a blog post about making no-knead bread.  When I say "a while ago," I would estimate that it was at least 2 years, if not 3 years ago.  Sometimes, it takes me a while to get around to doing things!  Finally, though, I remembered that I wanted to try making this bread, and I bought my ingredients and set about trying it.

The blog post I used for my bread is here:  http://www.simplysogood.com/2010/03/crusty-bread.html
The original post gives a number of variations on this bread, all of which sound really good.  I wanted to try the regular version first, just to see how it worked out for me and whether I wanted to make it on a more regular basis.  I really like the fact that this recipe has an overnight raising time during which I do not need to do anything with it.  I also like the fact that the timing is flexible.  I'm not repeating all the details of the recipe here - please use the original blog source above.  I just wanted to show how mine came out.

The basics of this bread are so easy.  Just combine 3 cups of flour, 1 3/4 teaspoons of salt, 1/2 teaspoon of rapid-rise yeast, and 1 1/2 cups of water in a reasonably large sized bowl.  The dough will be sort of sticky and messy.  I had to add a little more water to get my flour incorporated.  As the source blog instructs, I covered it with plastic wrap and left it on the counter.  The recommended time is 12-18 hours.  I think mine went for about 20 hours, so don't worry about it if you're a bit over on the timing.  What was initially a gooey blob in the bottom of the bowl rose to become this:

The bowl is 10 inches wide and about 6 inches tall, so that may help with perspective.

I had set my oven to 450 F as required, and I used my red Kitchen Aid Dutch oven for this recipe, which I put in the oven to heat for 30 minutes.  Meanwhile, I scraped the dough out of the bowl onto a heavily floured wax-paper surface, formed it into a round-ish shape, and put the plastic wrap over it again.  I then went away for 25 minutes while the Dutch oven was heating and the dough was considering its future.

At the 30 minute mark, I removed the hot pan from the oven, took off the lid, and dropped my dough into the pan.  At this point, it looks pretty pathetic.

I put the lid on and let it bake for 30 minutes as instructed.  Then, I removed the lid and baked it for its final 15 minutes.  Here it is just after removing it from the oven.  Let me tell you, the smell was amazing!


It produced a lovely loaf with a crusty exterior and a lovely moist interior.

This is the loaf after a couple of slices were removed - you can see that the interior is airy and not too dense.  I'll definitely be making this bread again, and will try some of the variations given in the original post.  The orange and cranberry sounds great, as does the lemon rosemary.  I do have a bread machine and I use it from time to time, but this recipe is just as easy and makes a delightful loaf.  I thoroughly recommend it!


Friday, March 18, 2016

The Wedding

I never blogged about the wedding.  I wasn't blogging much at the time, and it seems like such an afterthought to blog about it now, but I feel like I should blog about it just to record the memories. Marc and I were married on a beautiful September day, when the sun shone and the birds sang and there was a little bit of magic in the air.


I think that part of me had given up on the dream of a wedding day, or ever finding a person that would put up with my idiosyncrasies and peculiarities for long enough to want to share a permanent bond with me.  That made this day all the more thrilling and exciting for me, and I wanted it to be really memorable.  At the same time, I am now geographically very far from most of my friends, and haven't really made any strong bonds in this area, so it was with some sadness that I realized it had to be a very small wedding.  There's nothing wrong with small weddings, but there were at least a dozen people I wished could have been there, but whom I simply couldn't ask to attend, given the distance and the cost of travel these days.  As it was, we had 16 guests, mostly local, at the lovely Magnetic Hill Winery here in Moncton, New Brunswick.  The winery features a historic small barn that was just the right size for our small ceremony and dinner.

We had some difficulty in finding an officiant because neither one of us is religious, and yet we wanted someone who respected our wish for a meaningful ceremony.  We found the perfect officiant through the Unitarian Fellowship.  He has presided over a wide range of ceremonies including Wiccan and Pagan rituals, as well as mixed-faith marriages.  We felt a good connection when we met with him, and decided that he was our choice to perform the ceremony. We carefully studied a wide range of material for wedding ceremonies and selected wording that was meaningful and significant to us.  It made for a unique and customized ceremony that met all of our preferences.

The dress was an absolute fiasco that almost didn't happen!  I had ordered what I thought would be the perfect dress in a lovely pale silvery grey colour, and I had planned to do turquoise and green embroidered beadwork on the bodice.  Sadly, when the dress arrived, it was sack-like and shapeless and made me look like death warmed over.  I was crushed, and didn't know what I would do.  I turned to the internet and found Frock Follies, and ordered a crushed velvet custom dress 6 weeks before the wedding.  I didn't tell Marc much about it, but said it included dark green.  He went ahead with his order from the Gentleman's Emporium website based in the US, and didn't tell me what he had ordered either.  Marc's outfit arrived quickly (but I wasn't allowed to see it).  Meanwhile, I grew increasingly panicky about my dress since the dressmaker wasn't sending any updates and I didn't want to be a pest about asking, so I just kept quiet.  Almost miraculously, my dress arrived on the Monday of the wedding week (the wedding was on Friday).  My huge sigh of relief was heard throughout the city I'm sure!  Fortunately, it fit really well and was beautifully made.

The most amazing thing about the dress and Marc's ensemble is that they matched almost perfectly - as if they had been made to be together.  Even though neither of us saw what the other was ordering, or knew anything other than "dark green" being a colour, we both chose a nearly identical colour and we both chose the cream accent colour without knowing the other's choice.

Our rings were custom made by Magee's Jewelers in Fredericton.  They specialize in custom engagement and wedding rings, and were delighted to work with the stones that I had.  The stones included in our rings, as well as the gold, came from a number of different rings passed on to me from my ancestors, including my grandmother and great-grandmother on my mother's side.  Having rings made from the treasures of these strong and resilient women who were a part of my history made me feel as if they, too, were a part of our special day.  In addition, we had a large copper jug filled with fresh sunflowers. The copper jug belonged to my grandfather, so he too was there to celebrate with us that day.


I was absolutely delighted that my cousin Simon from England was able to attend.  I had not expected any of my family members to attend, apart from my parents.  I was really surprised and so pleased that he was able to come for a visit and he turned out to be an absolute champion at attending to critical matters that arose on the day, like helping to frost cupcakes and fill water pitchers.  It was truly a blessing to have him with us.

Having my Dad walk me down the aisle was one of the best parts.  I feel so lucky to still have both my parents healthy and able to be there for our wedding, not to mention helping with many of the preparations and decorating aspects.  It was extremely difficult not to dissolve into an emotional puddle on the walk down the aisle, but I managed to keep it together.  Only just!  Do take a moment to notice the stunning bouquet - my mother is an absolute whiz with flowers and she made it just for me.  The stems are wrapped with a lovely green ribbon.

We also enjoyed the musical talents of a wonderful harpist, Dorothy Brzezicki, throughout the ceremony and afterwards.  She was absolutely perfect.

We wrote our own vows from scratch, and Marc even altered his on the day of the wedding, which was a bold move, but we were able to read them from prepared, printed cards, so it was easy for him to make those last-minute changes.  I'm sharing a video here of the ring exchange and kiss, so if you weren't there, you can still share in a little piece of our day.   We didn't have a professional videographer for the wedding - this was taken by Marc's sister-in-law.  The lighting isn't perfect, but it is the words that count.

I was unable to find a local cake decorating person to create the cake I really wanted for the wedding, so I made my own cupcakes instead.  We had a sunflower theme, so I made chocolate and lemon cupcakes and frosted them to look like sunflowers.  (thank you Pinterest!)  My cousin Simon helped out with the frosting and we displayed them on a rented cupcake stand.  It was just right for the theme and everybody seemed to enjoy the cupcakes.

We were also delighted by Marc's Dad and his wife who surprised us with a musical performance, aided by the post-dinner jazz trio.  Martin played the keyboard and Holly sang for us - they are both extremely talented!

I felt tremendously blessed to have so many people who helped with making our day the magical moment that it was, and am thankful to have such wonderful, loving family and friends.  All in all, it was the perfect day and the perfect wedding.


Saturday, February 27, 2016

Friday's Hunt (on Saturday)

I'm trying to get back into the blogging groove but I don't always have the right topic at hand, so today I'm doing Friday's Hunt, a day late.  Hopefully the hostess of Friday's Hunt won't mind!

The objective of Friday's Hunt is to find the 3 things on the list, and blog about them.  This week's list of 3 things was:
1. Starts with I
2. Week's Favorite
3. Something Blue

For number 1, I was a bit stumped, because I couldn't think of things starting with I that were interesting to talk about.  I did find the letter "I" though, and that was in the form of my spinning wheel bobbin, partially full of spun yarn.  Do you see the capital I?  The ends of the bobbin form the top and bottom bars, while the yarn being spun is along the long bar of the I.


Today, for the first time since I have lived in New Brunswick, I went to a spinning event!  It was great for me to get out and be with some other spinners.  I used to really enjoy my Iowa spinning guild, and the fun Friday nights we would have spinning and chatting about our lives.  I really miss that group tremendously, and also the enjoyment it brought to my life.  It has been really difficult for me to fit in to New Brunswick, and the city of Moncton in particular, although I often find it difficult to fit in, so it's not surprising.  

Four years ago, I went to a Maritime Spinners Retreat as a yarn and fibre vendor, and remarkably, somebody from that long-ago weekend remembered me, and added me to an invitation for an event today.  From 12:30 to 4:30, a group of local spinners, knitters, crocheters and rug hookers met for fun and fibre festivities.  I really enjoyed myself.  Even more remarkably, a few people at today's event remembered me from that weekend, four years ago, and even remembered my name.  I wish I had the ability to remember people's names like that!  Hopefully there will be more opportunities for me to participate in spinning days with this group, although this is the first time they've had this kind of get-together.

Today I spun some green Blue-faced Leicester fibre from my stash in the "Terrarium" colourway.  

I also spun the fawn-coloured fibre you see in the "Letter I" picture.  That is some lovely 100% llama roving from Eden Hills Farm.  Specifically, it's Llenny the Llama!  I was so excited to be spinning this fibre because Teresa sent it to me as a sample for an assessment, since it's the first time she ever had her llama's fibre processed, and she's not a spinner (yet), so she wanted someone to give her an opinion on it.   It is extremely soft and has a long staple length, since Llenny had not been sheared in quite some time.  The mill that processed the fibre did a great job on cleaning it and there is a little bit of hay in the fibre, but not much, which is what I would expect for a roving that hasn't been through any acid baths or other harsh commercial processes.  Those processes remove every speck of hay, but also take some of the 'life' out of the fibre.  The colour is very even and there are very few lumps or second cuts in the roving.  The fibre is even and consistent and spins up beautifully.  I expect that it won't be long before you can purchase some Llenny roving for yourself if Teresa decides to add it to her farm market offerings.  Here are a couple of close-up shots of the single ply I have spun so far.  I plan to ply it into a 2 or 3-ply yarn afterwards and do a test knit with it.  Thank you so much for sending me the sample, Teresa!


The second item on the list is Week's Favourite.  That was tricky for me because this was a busy week.  I spent Wednesday through Friday in Halifax visiting my parents while also accommodating work meetings.  I hadn't seen them since Christmas, so it was really great to visit and spend some time catching up.  I do wish I lived closer to them, because now it's a 3-hour drive, but it's still better than the 33-hour drive when I lived in Iowa.  However, I didn't take any pictures there, so I couldn't use that for my blog post.  When I returned home to Moncton though, I was surprised by a special gift that Marc had bought for me while I was away.  The newest flock member!
Although this little sheep doesn't have a name yet, he certainly brought a big smile to my face and made me especially happy to be home.  That was one of my favourite moments of the week.  

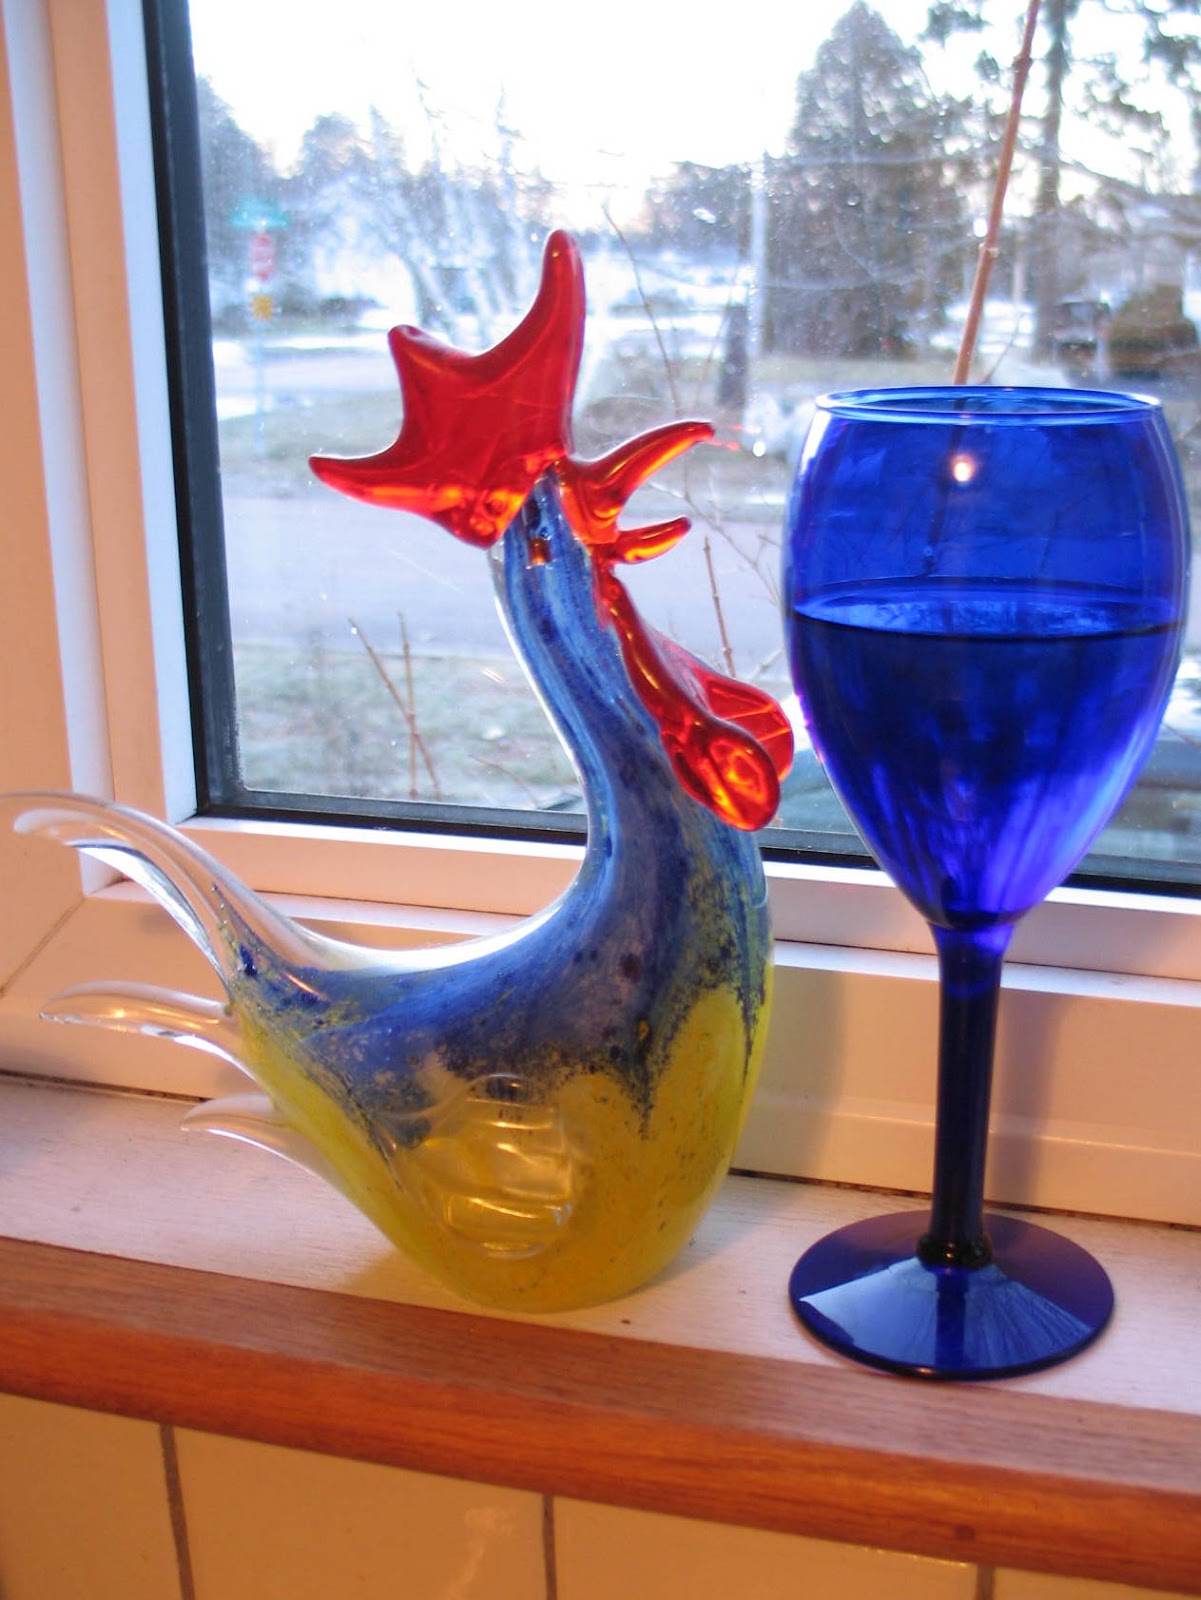
The last item on the list is "something blue."  Today, after a busy day of spinning, it was good to come home and relax for a little while with a glass of Pinot Grigio.  I had it in my favourite blue wine glass.  I bought these glasses many years ago at either Pier 1 Imports or Wicker Emporium - I can't remember which.  I love the deep blue colour of the glass and always enjoy using them, even when it's not for wine!
I put the glass next to our glass rooster, who also has some blue "feathers" on him.  He's a handsome guy and he doesn't steal any of my wine.  Today's wine is "20 Bees" Pinot Grigio, which is an Ontario wine made from 100% Ontario-grown grapes.  I like the little man riding on the back of the bee on the label.  And note, he's wearing blue pants.  

Wednesday, February 17, 2016

Lemon Chicken Enchiladas (with modifications)

Oh dear.  I cannot believe it has been over a year since I last wrote a blog post.  I suppose that's a good indication that it has been a busy year, and indeed it has.  Sometimes I think about writing and I decide that I haven't got anything to write about.  Now, as I sit here typing, I am thinking of about 100 things I could probably write about, but haven't.  I'm not even sure why today seemed to be the day that I should write a post, but it is.

Perhaps one reason I thought I'd write a post is because I decided to try a recipe posted by a friend of mine from Iowa.  I try to keep up with her blog even though I don't have a lot of time for blog reading these days.  In part, that's because she always has cute goat pictures, and I can't resist a cute goat!  I wanted to show how well this recipe turned out, even though I took it for a walk that was a bit off the beaten path.  So, although I should probably write about a lot of other things, today I'm writing about supper.

Over on the Eden Hills blog, you can see the original recipe that I used as the basis for tonight's creation - Lemon Chicken Enchiladas.  I learned that the recipe made 5 large enchiladas, and I wanted to make either 6 or 8, depending on how many I could fit in the pan, so I thought I should add some extra ingredients to it.

The original recipe starts with sautéeing 1/2 a cup of onion and 1/2 a cup of peppers.  The peppers were crazy expensive in the grocery store (like everything here in Canada these days, due to the poor Canadian dollar value when it comes to US imports).  So, instead I sautéed 2 small sweet onions with about 1.5 cups of diced frozen butternut squash and about a cup of frozen chopped kale.  The amounts are approximate - use your own judgment based on how many you want to make, and what vegetables you prefer!


I then added about half a can of black beans, and about 2 cups of chopped cooked broccoli.  I'm always looking for ways to add more vegetables to our diet, so this seemed like a recipe that would allow for lots of modification.


I love the freezer bags of chopped kale - I can easily add some to casseroles, soups, stir-fry dishes, and other types of recipes without any trouble.  It also means I don't end up with sad, wilted looking fresh kale in my fridge because I forget it's there or I don't have time to wash, de-rib, and chop it all. Frozen veggies are a life saver some days!  I used the PC Blue Menu black beans (available in Canada) and the broccoli was from Costco - frozen in the microwave baggies.


After the veggie and bean mix was thoroughly heated, I added 1 tub of PC Blue Menu low fat ricotta (available in Canada).  Use whatever brand you have available.
 

The original recipe called for 2 sliced chicken breasts, but boneless chicken thighs were on sale this week, so I used those instead.  I sauteed them in a bit of EVOO and then chopped them into bite-sized pieces.  If you prefer, use a chicken substitute, or any other meat or protein source you enjoy!


When the chicken was cooked, I deglazed the pan with the soy sauce and lemon juice called for in the original recipe.  That recipe called for 3 tablespoons of each, but I used 6, for good measure!  It made a nice rich sauce.


I added the deglazing sauce and chopped chicken to the veggie mix, and then began the process of making the enchiladas.


Each one was made by scooping a couple of large spoonfuls of the mixture into a large size whole wheat tortilla (Casa Mendoza brand), and rolling it up.  I managed to get 6 of them into a 9 x 13" glass pan.  As you can see, I had quite a lot of the filling mixture left over.  I'll probably make some more later this week, or maybe do something else with the filling mixture.  For now, it's in the fridge. I covered the enchiladas with a jar of Classico Tomato and Basil pasta sauce.  The original recipe has a lovely separate recipe for the enchilada sauce, but I was a bit pressed for time, so using the Classico sauce helped me get these done quickly.  One could add any number of spices to the sauce, as recommended in the original recipe.  I tend to like things fairly mild, so I didn't add any chili or other hot spices to the mix.  It would have been easy to add some straight into the jar of sauce and shake it up before pouring onto the enchiladas.


After that, I covered the top with grated 3-cheddar blend.  At this point, I re-checked the original recipe and saw that I was supposed to bake them before adding the cheese.  Oops.  I put foil over the top before putting them in the oven so the cheese wouldn't burn.  I also sprinkled on some ground mixed Italian herbs before popping it in the oven.


It came out looking like this!


This dish baked for about 45 minutes at 375F, and then I took the dish out and let it stand for about 10 minutes before trying to extricate the enchiladas from the pan.  This worked relatively well, although it certainly helps if you have a long spatula or other utensil for sliding under the length of the tortilla before transferring it to the plate.


Both Marc and I really enjoyed them and it will make 3 meals for us, since we had plenty by having 1 enchilada each for supper.  There are 5 veggies in this recipe (kale, broccoli, squash, onion and tomato) as well as lots of protein from the chicken and black beans, not to mention the cheese, and we had our starch from the whole wheat tortilla, so I felt it was a well balanced meal.  I would definitely do this again and would vary the meat and veggies to suit what I have on hand.  I have to admit that the lemon flavour wasn't particularly noticeable, but that's probably because I used a wider range of ingredients than the original recipe, so it diluted the flavour of the lemon.  Give it a whirl!