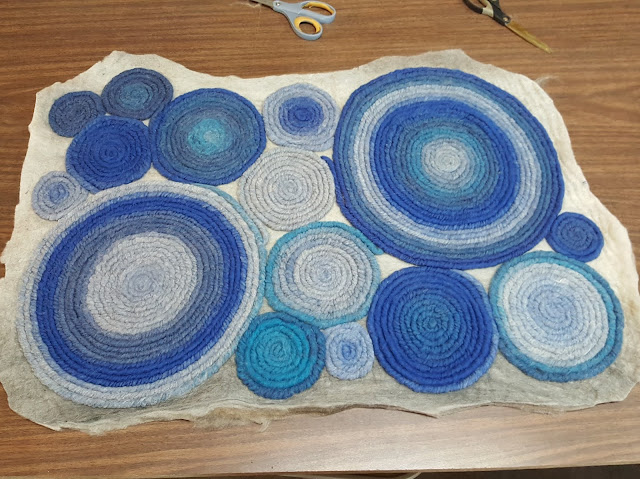
We used very bulky corespun yarn (spun at the mill) in our rugs - it was about the diameter of one of my fingers - so really thick yarn! Before the workshop, we had to choose colours that we would like in our yarn. I chose turquoise, blue and grey. The yarn is made by wrapping fibre around a 4-ply wool core. The colours slowly change through the skein. We had to get the yarn wet and then we created spiral circles with the yarn on the surface of a large felting machine. Each participant had a space of about 2 by 3 feet on the table. I didn't take any pictures during the process of making the spirals, but here you can see the felting table surface.
After making our spirals, alpaca/wool batting was placed on top of the spirals to form the rug base. The felting table has a large, heavy top, which is closed to squeeze out all the water and to begin agitation of the wool, which starts the fulling process. Fulling is a step before felting, during which the fibres begin to lock together. After 10 minutes on the felting machine, the lid is lifted and you can see here the backing fibre which has been compressed and fulled against the spirals. Twp rugs fit on the press.
The rugs were then transferred in a 'sausage roll' format into a spin dryer. They did a normal spin cycle in an old top-loading spin-dryer before being put outside in the sun to dry. Fortunately it was a beautifully sunny day with some good wind to get the rugs drying quickly. Here's my rug along with another one when it first came out of the dryer. You can see how the spirals adhere to the backing felt, but at this point, with a little effort, you could have pulled it apart.
While the rugs were drying, we learned how to do blanket stitch on a small sample rug, since our rugs will eventually be blanket-stitched all the way around to keep the edges nice and sturdy. The resident mill cat, Cookie, supervised from her own blanket throne, although she did do some sleeping on the job!
After the rugs were mostly dry, we had to cut them roughly around the edges before they could go into the needle felting machine. The needle felter pokes hundreds of felting needles into the surface of the rug, and as it felts, the rug begins to shrink a bit. Keeping the edges wide ensures that the shrinking doesn't go too far.
The rugs get passed through the felting machine ten times in total - five times per side. Each time you put it into the machine, you vary the angle so that the needles don't always go in exactly the same place. Here's a couple of rugs being fed into the needle felter.
Here's mine coming out the other side after one of the passes. The needles compact the wool each time, making the colours more vibrant on each pass.
After the ten passes through the felter, the rug is ready for final trimming, which is done much more closely to the edges of the spirals. The last step will be blanket stitching the edges, which I haven't yet done.
All the rugs were beautiful. This one looks like it belongs in a spa.
Lots of pretty colours.
Some prior rugs we were shown as examples demonstrate how you can use just natural fleece colours if you wish, like this one from 100% alpaca. You can see the blanket stitching on this one.
Here's my final rug at home, with my foot in the picture for scale. I'm really pleased with how it turned out, and I think I'll use it in the bedroom or bathroom. It's so soft on the feet!


